How to remove the gel from the nails: beautician or do it yourself?
How to remove the gel from the nails? You must have wondered for sure too. By reading this article you will find out what you need to remove the gel on your own. And after removing it, don't forget to put some nail polish on to protect your nails! Find out how to apply nail polish flawlessly even when it is not possible to go to the beautician! Watch our video tutorial and get to work in the comfort of your home!
How to remove gel from nails do it yourself at home: difficult removal, but not impossible
When you do your nails with gel, you feel in heaven: they are long, strong, beautiful, unique and original. And above all you know that the treatment with the nail art gel will resist and you will not have to fear every morning that it is ruined on the PC keyboard or washing the dinner dishes. And also that you won't have to do flash repairs, fumbling with nail polish and solvent, while you have a thousand other things to do. But when the nails begin to grow and you have to remove it necessarily, if you can't go to the beautician, and unfortunately all this happens often in a difficult period like the one we are experiencing, you feel lost. How you do it? Could you try it "do it yourself" in your home? Yes, of course, you can also take it off yourself. But how? And possibly without damaging your nails! Well, in fact, it is a bit complex to remove the gel from the nails, without resorting to the beautician. Are you capable of it? Definitely yes, but you have to be very skilled and cautious.
See also


The procedure for removing the gel reconstruction
With gel nail reconstruction you can have your nails looked after and perfect for about a month, but then the gel must be removed completely or discarded to apply it again. To perform the gel removal yourself, do it yourself at home, first of all you need to know with which type of gel the treatment was carried out. The classic ultra-resistant and hard one or the one similar to the softer and thinner semi-permanent nail polish? Normally, the very hard and ultra-resistant classic one is used. The traditional gel is used both with tips and with graph paper. But there is also another gel, a product very close to semi-permanent nail polish, thinner than the traditional one, called soak off, less difficult to remove. Both the classic gel and the soak off provide for the use of LED lamps for polymerization, but the first is usually applied and removed with the bur by the beautician, the second can be completely eliminated from the acetone and from a less hard file , while having excellent resistance and hold on un-filed nails of short or medium length. In the latter case, everything will be simpler. Prepare each product with care and everything you need: make-up remover cotton pads, file, specific solvent and silver paper, reinforcing nail polish. do not damage the surface of the nails. Wrap the disks soaked in solvent on the nails with silver paper. After about ten minutes, remove everything and if there are gel residues try to remove them delicately with orange sticks. Do not overdo the acetone too much and rinse your hands immediately after using it. If, on the other hand, it is a very hard classic gel, you need the bur, which must be used exclusively by the beautician, as it is complicated to use and apart from that you can hurt yourself and damage your nails. The thinner soak off gel is not very suitable for a noticeable lengthening of the nails, which may scratch due to its lower resistance.

How to remove the gel reconstruction without a bur
Do not use the bur alone, but if necessary try to remove the enamel with the help of two files, one harder and another less hard fine-grained, a buffer, a degreaser for nails, an oil for the cuticles, ie the cuticles, a mild disinfectant and a reinforcing nail polish for the stress suffered by the nails. Use the hardest file first, a coarse-grained cylinder, which removes most of the gel: it starts from the free edge, that is, from the area of the nail outside the fingertip, which is less sensitive; in the upper part of the nail you will experience more discomfort and heat. Remove the dusty material that forms with a brush, then work with the less hard, more delicate grain file, until most of the gel goes away and you can see the natural nail; it also eliminates the elongation of the gel, but be careful not to damage the nail plate, the cuticles and the sides of the nail. Always leave a thin film of gel to protect nails that have become more sensitive. Use a mild disinfectant, move the cuticles back with an orange stick, massage your fingertips with a nourishing oil, buff your nails with a buffer and then use a strengthening polish for a few weeks. Then file them a little, to give them a slightly rounded shape and leave them short enough, given their momentary fragility. If, on the other hand, you intend to remove the gel with the solvent, know that you will have to soak your nails in this solution for about ten minutes. Then you will have to peel off the gel with a stick. The treatment is not very advisable, as it risks significantly damaging the nails.

Gel nail art: a creative passion more than a manicure
If you love nail reconstruction and gel nail art, you can choose from many different decorations: polka dots, flowers, with color contrasts, two-tone, with vintage details, inserts with rhinestones and of various kinds. Many of these decorations are a little too flashy, but most of them are flashy, but refined; others are more sober and classic, but very elegant and finely creative. As a shape they can be almond, pointed, stiletto, round or squoval. The Baby Boomers, faded nails, with a degradé effect, on a pink or nude base, are becoming popular in recent times. On transparent nails, decorations with leaves in gold and silver or with metallic or glitter details are in fashion. Sharp color contrasts are also very popular, such as black and salmon or blue and gold.

Latest tips for the well-being of your nails and the beauty of your hands
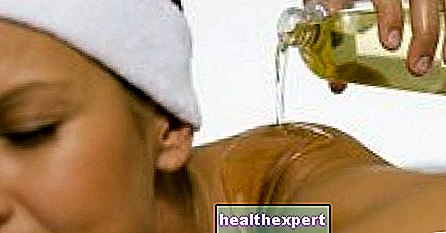
And above all remember never to remove the gel with your hands or even your teeth! Your nails could become weak and inflamed for a long time and the tearing would damage the keratinized cells, which protect their surface, flaking it ruinously. What really hurts your nails and can make your hands ugly is not the gel, the acrygel or the semi-permanent, but the way in which these products are removed. Remember to use a very abrasive file only in the first part of the removal, so as not to furrow the nails and not damage the cuticles. Do not remove the gel layer completely, so that the nails do not get inflamed and do not break easily. And don't forget to use the strengthening nail polish: your nails will be more prone to flaking, being more fragile after the removal of the gel reconstruction. Massages with oils especially if vitamin E nourishes and protects nails and fingertips. There are also various natural remedies that are very effective for the well-being of your nails, as well as for the beauty of your eyebrows and hair, such as lemon, castor oil or other oils rich in vitamin E.To remove the gel or permanent polish without a bur and also to carry out the application treatment yourself, you can buy each product online with Amazon, where everything you need is available: nail cleaner, semi-permanent nail polish, solvent, polish polish or top coat, multipurpose to sanitize nails and remove residues, small, medium and coarse sandpaper cylinders, brush, buffer, cotton pads and of course every possible type of reinforcing nail polish.
.push({});
</script></center>
</footer><!-- .post-footer -->
</article>
</main>
<aside id="sidebar" class="sidebar-sticky">
<div class="sidebar-inner">
<div id="wyy-slider-posts-7" class="sidebar-widget wyy-widget-slider-posts">
<div class="posts-box-carousel">
<div class="owl-carousel owl-theme" data-controls=".nav-dir" data-items="1" data-autoplay="false" data-rtl="false">
<div class="item">
<a href="/test-personalita-doccia-TWJ">
<img style="width:326px; height:353px;" width="410" height="510" src="https://woodsound.net/img//images/amore-e-psicologia/test-la-prima-parte-del-corpo-che-lavi-quando-fai-la-doccia-dice-qualcosa-di-te.jpg" class="attachment-wyy-md-vertical size-wyy-md-vertical wp-post-image" alt="Test: The first part of the body you wash when you shower says something about you" /> </a>
<div class="item-overlay clearfix">
<div class="inner">
<div class="post-summary post-format-standard">
<div class="post-cat">
<a href="/amore-e-psicologia/" class="label label-default">Love-E-Psychology</a>
</div>
<h2 class="post-title">
<a href="/test-personalita-doccia-TWJ">Test: The first part of the body you wash when you shower says something about you</a>
</h2>
<ul class="post-meta">
<li class="post-date">
<span class="fa fa-clock-o"></span>26,2024 </li>
</ul>
</div>
<ul class="nav-dir">
<li><button class="btn"><span class="fa fa-caret-right"></span></button></li>
<li><button class="btn"><span class="fa fa-caret-left"></span></button></li>
</ul>
</div>
</div>
</div><div class="item">
<a href="/aspettare-dei-gemelli-Y6N">
<img style="width:326px; height:353px;" width="410" height="510" src="https://woodsound.net/img//images/genitorialitu00e0/gravidanza-gemellare-sintomi-e-rischi-di-unattesa-particolare.jpg" class="attachment-wyy-md-vertical size-wyy-md-vertical wp-post-image" alt="Twin pregnancy: symptoms and risks of a particular wait" /> </a>
<div class="item-overlay clearfix">
<div class="inner">
<div class="post-summary post-format-standard">
<div class="post-cat">
<a href="/genitorialità/" class="label label-default">Parenthood</a>
</div>
<h2 class="post-title">
<a href="/aspettare-dei-gemelli-Y6N">Twin pregnancy: symptoms and risks of a particular wait</a>
</h2>
<ul class="post-meta">
<li class="post-date">
<span class="fa fa-clock-o"></span>26,2024 </li>
</ul>
</div>
<ul class="nav-dir">
<li><button class="btn"><span class="fa fa-caret-right"></span></button></li>
<li><button class="btn"><span class="fa fa-caret-left"></span></button></li>
</ul>
</div>
</div>
</div><div class="item">
<a href="/7-cose-da-non-prestare-mai-LMY">
<img style="width:326px; height:353px;" width="410" height="510" src="https://woodsound.net/img//images/lifestyle/7-cose-da-non-prestare-mai-(se-ci-tieni-alla-tua-igiene-personale).jpg" class="attachment-wyy-md-vertical size-wyy-md-vertical wp-post-image" alt="7 things to never pay (if you care about your personal hygiene)" /> </a>
<div class="item-overlay clearfix">
<div class="inner">
<div class="post-summary post-format-standard">
<div class="post-cat">
<a href="/lifestyle/" class="label label-default">Lifestyle</a>
</div>
<h2 class="post-title">
<a href="/7-cose-da-non-prestare-mai-LMY">7 things to never pay (if you care about your personal hygiene)</a>
</h2>
<ul class="post-meta">
<li class="post-date">
<span class="fa fa-clock-o"></span>26,2024 </li>
</ul>
</div>
<ul class="nav-dir">
<li><button class="btn"><span class="fa fa-caret-right"></span></button></li>
<li><button class="btn"><span class="fa fa-caret-left"></span></button></li>
</ul>
</div>
</div>
</div><div class="item">
<a href="/meryl-streep-si-scatena-su-zoom-2BJ">
<img style="width:326px; height:353px;" width="410" height="510" src="https://woodsound.net/img//images/news--gossip/compleanni-in-quarantena-meryl-streep--la-regina-delle-feste-online.jpg" class="attachment-wyy-md-vertical size-wyy-md-vertical wp-post-image" alt="Quarantined birthdays: Meryl Streep is the queen of online parties" /> </a>
<div class="item-overlay clearfix">
<div class="inner">
<div class="post-summary post-format-standard">
<div class="post-cat">
<a href="/news--gossip/" class="label label-default">News - Gossip</a>
</div>
<h2 class="post-title">
<a href="/meryl-streep-si-scatena-su-zoom-2BJ">Quarantined birthdays: Meryl Streep is the queen of online parties</a>
</h2>
<ul class="post-meta">
<li class="post-date">
<span class="fa fa-clock-o"></span>26,2024 </li>
</ul>
</div>
<ul class="nav-dir">
<li><button class="btn"><span class="fa fa-caret-right"></span></button></li>
<li><button class="btn"><span class="fa fa-caret-left"></span></button></li>
</ul>
</div>
</div>
</div>
</div>
<!-- .owl-carousel -->
</div>
<!-- .image-slider -->
</div>
<center><ins class="adsbygoogle"
style="display:block"
data-ad-client="ca-pub-8774756844524635"
data-ad-slot="4569816776"
data-ad-format="auto"
data-full-width-responsive="true"></ins>
<script>
(adsbygoogle = window.adsbygoogle || []).push({});
</script></center>
<div id="wyy-recent-posts-5" class="sidebar-widget wyy-widget-posts">
<div class="widget-title">
<h2 class="title">Editor)