How to put on eyeliner: the tricks for a fast and perfect application
It is certainly no secret that the application of eyeliner has always been a rather feared beauty technique, especially by women who are less expert in make-up. After all, it is a fundamental step for a magnetic and irresistible eye make-up, but not really easy to make, which therefore deserves a bit of training to master the technique to perfection and show off a noteworthy look.
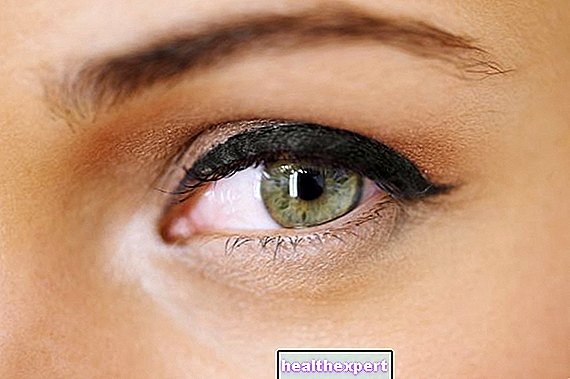
The eyeliner, or eye-liner, is a line, more or less thin, which is made starting from the upper eyelid of the eye and continued beyond the outer corner of the same, so as to create a comma upwards in degree to lengthen the gaze and make it deeper and more magnetic. There are different techniques and renders of this beauty trend, from the more classic ones, to the cat-eye up to the graphic line of the Fifties, to be chosen according to your taste, style and the shape of the eye to make the most of it.
Below you can find all the steps and useful tips to learn how to apply the eyeliner quickly and flawlessly. These are simple and quick tricks that act as a sort of tutorial ideal for those who are beginners and want to learn quickly. to be able to reproduce it every day, without too much effort and avoid the most common mistakes.
We remind you, however, that before surprising everyone with an effect make-up that shows off a textbook eyeliner, it is necessary to show off perfect eyelashes - to be enhanced with a decisive touch of mascara - and well-defined eyebrows, as the video suggests. follows.
1. Evaluate the shape of the eye and choose the most suitable form of eyeliner
As already mentioned above, there are different forms of eyeliner we can use. When we talk about eyeliner, we refer in particular to the shape of the final line, also called quotation mark, which starts from the outer corner of the eyelid and which is able to best enhance our type of eye. For this reason it is essential to understand what it is. the shape of our eyes and choose the one that best suits us.
- If you have small eyes, eyeliner is a "last choice, because it will lengthen the eye", but to give this result, it is essential that its line does not start from the tear duct (or inner corner of the eye), but from a third. or half of the same. This must be thin and then go to enlarge as you get closer to the outside, from which you will then start a quotation mark up or slightly elongated.
- If you have large eyes, you can start the line from the tear duct, thus surrounding the whole eye, or from the middle, only above or only below. If, however, your eyes are round, avoid totally outlining them, both above and below. otherwise you will only accentuate their roundness.If, on the contrary, they are elongated, you can proceed without problems both on the upper and lower internal rhyme, taking care not to draw too long or inclined curves, which would cause an excessively unnatural and artificial effect.
See also


2. Choose the type of eyeliner: liquid, pen, pencil or gel
The choice of the type of eyeliner depends above all on your dexterity and experience. Here are all those on the market that you can choose from:
- Liquid eyeliner: it is the classic one, but it is not exactly the simplest to use, because it is rather difficult to manage; therefore it is not recommended for beginners.
- Pen eyeliner: it has a very precise stroke, it is suitable for those who have a certain manual ability but have the defect of drying up rather quickly.
- Gel eyeliner: this requires the use of a brush but allows you to have a line with a homogeneous color and a precise stroke.
- Pencil eyeliner: together with the previous one, it is the simplest to use for beginners. It is easy to manage, in case of errors it can be blurred and is also ideal for those who do not want to make an excessively visible quote.

3. Roll out a base
Before proceeding with the application, it is good to apply a base, so that the eyeliner can last longer and its line adheres more to the skin and is more homogeneous.
You can choose a veil of powder or a nude eyeshadow to spread on the upper mobile eyelid.
4. Position yourself correctly and keep your eyelids half closed
For a perfect application, it is necessary to have a nearby mirror and a support that acts as a surface for the elbow so as to have the hand as steady as possible and proceed with maximum precision.
Another fundamental aspect is to keep the eyelids half closed and avoid pulling them; to do this, we advise you to keep your chin up and look down, in this way you will be able to assume the ideal position without too much effort and in a natural way and to keep your eyes half closed and not totally closed.

5. Create the guideline for the eyelid line and the outer comma
Now we are in the highlight of our eyeliner operation which consists of two essential and complementary steps: the creation of the eyelid line and the outer quotation mark.
There are two simpler, faster and more effective methods that allow us to put on the eyeliner perfectly without going crazy.
The indents method
Draw small lines on the upper line starting from the inner corner (tear duct) or from the middle of the eye. Then join them with precision, using the eyeliner directly, or - for more insecure hands - first using a pencil and then the eyeliner.
At this point, dedicate yourself to the outer quotation mark: point upwards, positioning the pencil from the tip of the nose towards the outer corner of the eye; in this way you will have more or less the direction in which to draw your quotation mark upwards.
This technique is more suitable for those who want to create an eyeliner with a more delicate and less visible line.

The scotch method
Take a small piece of masking tape or tape and place it obliquely starting from the bottom of the eye to the outer corner, so as to have a guideline for the tail up.
Not only that, the scotch can also be useful for the first part of the operation, that is the realization of the line that runs over the eyelid. Its use is particularly suitable for those who want a fuller eyeliner. In this case, in fact, the scotch it will create real stencils, which will easily delimit the part that we will have to fill with color, thus creating a much more defined eyeliner than the previous one.
If you fear an unsightly panda effect or do not want to waste too much time, know that there are shortenings of all shapes on the market, so you can choose the one that suits you best and avoid some steps that can greatly lengthen or complicate the process.
How to fix post-application errors
If you come across some mistakes while applying eyeliner, don't worry; for the first few times in particular, it should be taken into account and considered rather as a normal thing. You just have to do a little practice, and after a while, everything will be easier and more immediate.
There are two ways to intervene in these cases:
Cotton buds + micellar water
You can intervene with a cotton swab soaked in micellar water but not with two-phase or waterproof make-up remover because it will also dissolve the amount of product you will apply later. This technique can be useful if you need to slightly thin one of the lines above the eyelid, so that the eyelienr applied to both eyes is symmetrical and identical.
Cotton swab + concealer
You can also proceed with a concealer, as long as you use it properly, after everything has dried properly.